How to Create Attractive Roblox Character Easily
Table of Contents
How to Create Attractive Roblox Character Easily
The most interactive gaming platform present in today’s time is Roblox. They offer a plethora of billions of playable games under various verticals such as; sci-fi, fighting, abstract, action, adventure, comedy, horror, military, modern, mining, and many more to cater to the needs and entertain users of all ages & groups.
But to play Roblox games on PC or Laptop you need to download a file by the name robloxplayer.exe. This .exe file allows players to enjoy a seamless and hindrance-free experience of playing Roblox.
Roblox has a considerable fan base of more than 100 million users and has won hearts since its release. It offers customized games to play along with customized character Roblox.
Roblox; not only provides users with tools & resources to develop exciting games but also to make customized avatars for gameplay.
Players can flaunt their creative skills to their fellow players and competitors by creating a customized Roblox character.
If you are also thinking of making an attractive Roblox character, you have come to the right place as here we will tell you how to create the same.
So, without any delay, let’s get into the nitty-gritty of creating a customized Roblox character.
What is the Roblox Character?
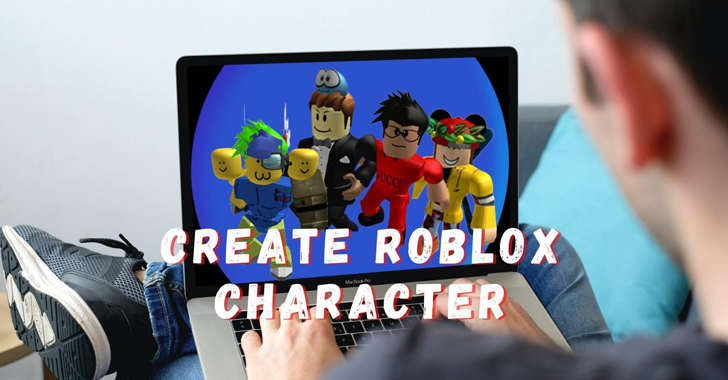
The Roblox Character or commonly called Roblox Avatar, represents the player’s appearance on Roblox. This is a customizable human-like-looking entity used to interact and communicate with other players on the Roblox platform.
A character Roblox comprises head, torso, arms, and legs and can wear different clothing, costumes, facial expressions accessories such as; hats, bags, goggles, guns, and many more.
Roblox provides players with endless options and possibilities to customize characters from existing items in the store or make their customized clothes and accessories for Roblox characters.
An avatar can be classified majorly into; R6 and R15. The R6 model consists of 6 body parts, whereas the R15 consists of 15 body parts.
Players can dress up their avatar in various looks such as; an evil character, cute pinky Roblox character girl, military Roblox character boy, and many other endless possibilities. According to their mood and theme of the game, they want to play.
Keep reading below to know how you can customize your characters and render them on Roblox.
How to Customize your Characters on Roblox?
For purchasing cool stuff for customization from the in-app store, users should have Robux, a form of virtual money.
If you do not have any Robux, you can either buy it from the in-app store or win by playing games if you don’t want to get Robux using these methods.
In that case, you can purchase the free stuff available for customization and pull up an exciting and attractive Roblox character.
To enhance the appearance of Roblox characters, users can choose from a wide variety of shirts, pants, t-shirts, shoes, goggles, bags, hats, and other junk.
Below mentioned are the steps that you can follow to improve the appearance of your character: –
- Use email and password to log in to your Roblox account.
- You will find a ‘Catalogue‘ option on the screen. From there, you can buy various stuff for your avatar if you are making a Roblox character girl.
- In that case, you can purchase pink items, cute headbands, and other girly things in exchange for Robux. You can also buy various pants, t-shirts, caps, shirts, and other swaggy stuff for your Roblox character boy.
- After you have purchased the items of your choice, click on the three horizontal lines on the upper right corner of the screen, i.e., the ‘Menu‘ option.
- A drop-down menu will appear. Click on the ‘character‘ option.
- A dialogue box will appear, and from here, you can customize your character Roblox according to your choice.
- There will be a list of various body parts and the items you can choose for that particular part; you can select & mismatch any combination according to your will.
- After you are done with customizing and making changes to your Roblox character, click on the wear option to save changes. After you have created a customized look, you can proudly show it off to your friends and enemies in Roblox.
How to Render your Character on Roblox?
Rendering is somewhat similar to photography and cinematography. It is a process of producing original three-dimensional images, immediate effects, and reality for GFX, profile pictures, banners, and other cool stuff on Roblox.
Before starting with the process of rendering, you need to download a few applications and plugins such as; Roblox Studio, Moon Animator plugin, Blender Stuff, and the old version of Blender, i.e., Blender 2.78.
After you have downloaded the mentioned items, follow the below-mentioned steps to render your Roblox character.
- Open Roblox Studio, choose any baseplate, and click on the character.
- Choose the ‘Plugins‘ option; a menu below the top bar will appear from that click on the ‘character inserter’ option.
- A new dialogue box will appear, which will automatically show your character. If not, then type your player id in the search bar of the dialogue box and choose R15 and click on insert.
- Your Roblox character will appear on the screen, now click on ‘ moon animator, a dialogue box will appear. Click on ‘file‘ and then ‘new animation‘.
- A small box will appear, type the name of your character and click on confirm.
- You will see a ‘+‘ sign; click on that, and a new dialogue box will appear. Click on your character and then tick-mark the ‘rig‘ option in the dialogue box that just popped up.
- A plethora of animation options will come in the dialogue box. Now it’s time for you to show your creativity and put up any animations on your Roblox character according to your choice.
How to upload created characters on Roblox?
After you are done with rendering, follow the below-mentioned steps to upload your created character on Roblox.
- Click on view from the top bar and click on the ‘explorer‘ option.
- A panel will appear on the right-hand side, and from that, right-click on the name and give a unique name to your character.
- Then choose the export selection option.
- A new dialogue box will appear; open ‘Blender’s stuff‘, type a file name, and click save.
Now, after adding animations using renders, you can also further enhance your Roblox character using Blenders.
We recommend you to use the Blender 2.78 version, as it has an easy-to-operate interface.
Blender’s website allows users to make attractive Roblox characters by putting in effects such as; frame range, texture, lighting, shadows, occlusions, resolutions, and many other factors.
After adding the products & making a customized Roblox character, you can make your character pose to click its picture and save it for use in Roblox.
Final Words
Well, users, we hope that you must have understood all the aspects of customizing a Roblox character.
As you read above, you can purchase stuff such as; costumes, shirts, t-shirts, pants, accessories, face expressions, etc., on the Roblox store for free or in exchange for Robux.
You can also create customized clothes and accessories for your Roblox character. Still, for that, you need to be a member of the Builders Club.
Players can also render their Roblox character a 3D look and aesthetic feel by following the abovementioned steps.
So, what are you waiting for now? Log in to your Roblox account now to change your face into an attractive Roblox character and show off your creative side to fellow players.


